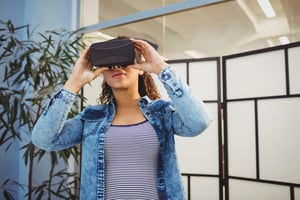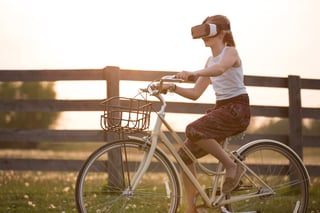
Virtual reality is steadily moving into classrooms, thanks to its affordability and the host of resources it provides for the curriculum. As more content is produced, teachers are becoming increasingly intrigued as to how to use it to supplement the lesson plan. A primary focus of this has been to search for existing apps that will help achieve learning objectives.
However, virtual reality also affords hands-on opportunities to promote creativity and self-expression in students. One of the most dynamic ways this can be achieved is by giving students the chance to design, build, and share their own virtual reality environment. Keep reading for ideas on how to create virtual reality content in the classroom!

360-Degree Panoramas
One of the simplest ways for students to develop their own virtual reality expedition is with apps that let them create 360-degree panoramas, such as Google Street View. This app grants students the opportunity to engage with environments outside of their classroom by letting them to create 360-degree panoramas of any location or landmark.
Using these panoramas gives students the ability to gather information and make inferences about the environment at hand. Students also have the option to share these expeditions with their peers, which provides a dynamic way to present research findings and will help encourage classroom discussion. To use Google Street View in your classroom, all you need is the app, a device to use with it, and a viewer to interact with the final product!
Follow these steps with Google Street View:
- Download the app on your device and open it
- Click on the "+" icon to take a 360-degree panorama
- Choose a location and move the camera in line with the yellow dots that appear. This works similarly to taking a panoramic picture on a smartphone, however, you will want to tilt the phone in every direction to capture the entire view.
- The 360-degree panorama will appear in your Google Street View gallery once you have finished taking it. Here you are given the option to publish the panorama to Google Maps, which will allow others to view it as well.
- Place your device into your virtual reality viewer and you are good to go. One option to view the panorama is through the app itself, simply open the image and click on the Google Cardboard button in the upper right corner. Another option is to open it in Google Maps.

360-Degree Films
Students can go beyond passive viewing by creating and producing their own virtual reality films using 360-degree video technology. These cameras shoot from all angles at once, producing 360-degree media that lets you see in every direction at once. Using this technology allows students to capture immersive simulations of their own environment, which they can choose to modify based on the learning objective.
Putting this technology at the hands of learners also allows them to personalize their learning and challenges them to cultivate new technology and critical thinking skills. For example, in the 360 Filmmakers Challenge, high school students were invited to use virtual reality to engage with an issue they cared about. The aim was threefold: to share their communities, to inspire action for change, and spur learning. Notably, these goals have the potential to reach beyond the classroom walls, which suggests that virtual reality learning has powerful implications outside of schools too. One of the facilitators of the 360 Filmmakers Challenge, Digital Promise, has developed a helpful guide to getting started with 360-degree filming.
Tools Necessary for 360-degree Films:
- A 360-degree camera: There are a number available on the market, including the Ricoh Theta or the 360Fly, and some come with microphones to capture sound. These cameras are often bundled with software to stitch the images together automatically. If not, the GoPro Max supports footage from other cameras and is compatible with YouTube.
- A virtual reality headset: You will use this to view your 360-degree film. One of the most affordable options is a cardboard viewer, but you may find that a more durable viewer will suit your needs better.
- Editing software: It is true that 360-degree films can be created without editing software. However, editing software is helpful when creating complex or interactive films.
- A tripod: Although it is not necessary, it may prove useful in holding the camera steady.
Available 360-degree Editing Software:
- Premier Pro: Adobe is a popular tool for education, so chances are your school may already have their software. Premiere Pro is a video editing software that provides tools for editing 360-degree video and stereoscopic video.
- Virb Edit: Designed by Garmin, this video editing software is free.
- Frulix Editor: Take advantage of this editor because for a limited time, this software will be free while it is in beta. Another benefit is that Frulix is web based, so you don’t need to download anything!
- Insta VR or Vizor 360: These entirely web-based applications are also a good solution, since many schools are turning to Chromebooks for their affordability.
Why Not Start Now?
The immersive nature of virtual reality helps engage students and provide meaning to their learning experiences. Allowing students to creat their own content not only inspires creative thinking, but it also introduces a whole array of new techniques that can be used to achieve learning goals. Content creation takes the one step further by giving students the reigns, so give it a shot! Not sure where to start? Check out my previous blog post on Getting Started with Classroom Virtual Reality for helpful insight on how you can begin integrating virtual reality into your classroom.
Get More Cost-Effective Charging and Storage for Your Devices
JAR Systems has developed a wall-mountable charging station. Designed to be different, this versatile solution is both simple and affordable. For just $295.00, schools can get the Essential 16 Charging Station and achieve individual security and charging for 16 devices. Request more information today on testing the Essential 16 Charging Station in your organization free for 30 days!
Click below to learn more about the Essential 16 Charging Station and request more information or a quote!

